5.03.2016

Meaningful Decor Ideas- Heather


I’m an art lover of all kinds.  Paintings, mixed media art, sculpture…I even find myself admiring old bricks on dilapidated buildings or moss growing through weathered stepping stones.  When it comes to decorating your home however you have to be a little more selective.  I’m all for art just because it makes your heart happy.  In my home I like to mix the pieces that I like with the pieces that have a strong emotional backing like images of my family, memories, and things that remind me of my journey through life so far.  There are lots of ways you can add meaningful art to your home and not look like you’re a day care or hodge podge of randomness (although random is good sometimes, right?) 

 
1.   Lyrics- My mom used to sing ‘You Are My Sunshine’ to me as a child.  I still get warm fuzzy feelings when I hear that tune so I decided to print out the lyrics and frame them in my son Lane’s room (it’s very fitting if you see his little sunny smile as well.)  I found this print below here. 


2.       Macro shots- You don’t have to be a photographer to capture the details of the elements around you that you really love.  Phone apps make it easy to create a look or play around with lighting.  Many places like Nations Photo Lab even let you print directly from your phone.   Are you especially proud of your rose bushes or fragrant lilacs?  Snap a macro shot and frame it in your home.  Did you love that restaurant on vacation or the old boardwalk?  Snap a cool angle of the sign or an old bench at the eatery, or a close up of the weathered wood on the boardwalk.  Is there a stepping stone walkway you notice every time you go to your favorite park?  Capture that, because someday many years from now you might forget what it looked like and want to relive those memories.  Why not save all those little moments at your fingertips. 


3.       Silhouette art- An easy way to make a group of pictures look cohesive and artful is to pick a few of your favorite images and have them made into silhouettes.  You could do a grouping in a bright and bold palette or go for a neutral pairing of black and white.  You can find these services plentiful on etsy.com and I even have a listing for them in my Etsy shop. 


4.       Roman numerals- I love these.  I like the simplicity of the lines and the fact that they represent a special date that’s personal to you.  They can look modern or traditional depending on the frame, and don’t compete or take away from other artwork.  I chose my son’s birthdays, but you could do wedding dates, first kisses, first date night after baby (kidding….but that is quite a monumental occasion), or whatever suits your fancy.  These are simple enough to do in programs you probably have on your computer like Microsoft Word.


5.       Greeting cards, invitations, or announcements- Have you ever gotten a card that you love to look at, and is so pretty that it seems like a shame to hide it away?  Frame it!  Whether it's a pretty illustration or a quote that speaks to you, it’s all ready to go up on the wall. 


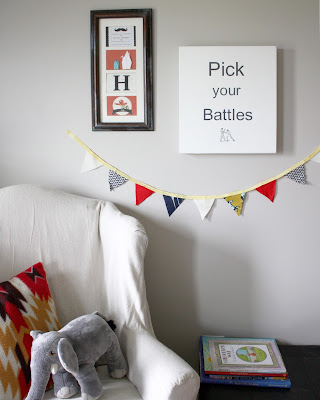
6.       Homemade artwork- Your child’s first painting is a cherished item.  So it’s sort of full of scribbles…that’s ok.  A piece from even the most expressive child when framed fits in just fine with a grouping of more refined images.  You can also opt to buy or paint clipboards and hang them on the wall as a flexible frame that you or your child can update as the creative juices flow.  Below I repurposed a farmhouse accessory (I believe it was some kind of feeding tray.  Please don't trust that explanation as I'm pretty farm illiterate) winding pieces of wire in various spots and using mini clothespins to display our favorite items of the moment.


7.       Fabric- My sister has a group of old scarves in very pretty patterns and colors that were passed down in our family.  Rather than throw them in a box to collect dust, she framed them in a grouping of colorful frames and placed them in an arrangement on her staircase wall.  The effect is beautiful and interesting.   You could use a sash from your wedding, a piece of ribbon from a bouquet, or a piece from a baby blanket or worn out onesie.


8.   Mementos- There is no shortage of ways to display relics from past adventures.  You can frame concert tickets, baby bracelets, baby foot prints, etc.  It’s also nice to create (or buy) a memo board where you can keep a revolving display of your favorite memories in a way that looks tidy and fun.


9.       Plates- Antique silver trays, a plate that has been passed down in your family that you’re too afraid to actually use.  These items can look great displayed on your walls. 


10.   Engineer Prints- You can go to your local Staples or Office Max and get what they call an engineer print.  It’s an oversized, high quality black and white print on standard weight paper.  The sizes range from 18” x24” to 36” x48”.  They are a great way to make a statement without spending a ton of money (prices range from $1.79 to $7.29.)  I found various maps from my husband and my favorite places and framed them in matching oversized frames above our mammoth of a sectional.  It’s nice to have an everyday reminder of our first adventure to our first big move across country.


11.   Family Crests and Monograms- This is an easy way to add a sophisticated piece that goes with all your décor while having something that is personal to you and your family.  It’s as simple as perusing through Etsy to playing around with your desktop office program and finding a nice font that you can print out oversized on a heavy cardstock to frame.


You may not get the perfect display first time around, and it might take a while to figure out you and your family’s style, but once you start adding meaningful pieces you’ll find that your home is more than the way it looks…it’s your story.  Now happy hanging!


Xoxo, Heather


4.28.2016

Sunday Picnic in the Park- Tiffany

Last Sunday, we were finally able to hang up the winter coats and dress down in layers.  The weather was nothing short of beautiful!  We feel so cooped up all winter and we made sure to take full advantage of the 70 degree weather and sunshine.

I want to remember days like these because I realize how quick the years really do pass.  

Our twins are nearly two and it seems surreal that this milestone is so near.  I try to capture something from these moments to have something to look back on- in all the chaos of our non-stop lives, it is a reminder of things that the camera lens captured but our eyes might have missed.  We opted for a park day and a picnic to take in the weather. We get to the park near our home and start on the playground.  My husband and I chase the twins in every direction as our oldest daughter Bella begs to play tag or walk the trail.  It's a challenge to balance having two toddlers and a 7-year-old.  I sometimes know I am that overprotective mother that has to be there when my child teeters climbing up the playground stairs but it keeps me sane to be right there.  So, we work through these challenges with our outings and find ways to balance the age gap. We come to an agreement and all decide to walk the trail.  My daughter reminds us that there was a creek area and we soon find ourselves stumbling upon our new favorite place!  This creek offers a world of discovery for the twins and keeps the interest of my oldest (a big wooohooo!).  My husband tries to teach Bella how to skip rocks (something that I fail miserably at every time).  I cautiously watch on as the twins pick up rocks and dirt and throw it with all their tiny might into the creek.  I will add that we walked away with only one small rock drop on the head.  This is a win for this rowdy bunch!

As I am looking around I see happy kids- all three of them!

My mama heart is so full!  We finally are able to pull all the girls away to go to the grassy area and set up a picnic.  They were all either so excited for the picnic or so starved from all the playing, but either way they dug right in!  All the girls made their own plates and avoided fighting over the food for the most part!  The picnic came to an end when everyone started running off in different directions. I packed it all up and we loaded back in the "Tesla" or van;) As we drove away, I thought it was one of those outings that actually was a complete success.  So many times I have this idea of how I hope the things I plan will turn out- and they rarely do.  With three different personalities you can never predict what the day will bring.  But this one...it was a beautiful thing!


Until next time...
Xo,
Tiffany

4.18.2016

DIY bow ties! - Heather


Wedding season is in full gear, and this year I have a very special one to look forward to.  My big sister (a.k.a. I.B., short for ‘itty bitty’) is getting married in June!  On top of this being an amazing occasion, I get to dress my little men up in some dapper finery; meaning bow ties, suspenders, and all!  They will be the adorable little ring bearers (hopefully the kind that will actually bear the ring down the aisle.)  Being the D.I.Y. person that I am, I decided to choose a fabric that would fit well with the wedding palette and construct my boys’ bow ties myself! 

I chose a pastel and gold confetti-esk print with a cream background that will complement the darker chambray shirts they will sport.  I snagged some suspenders and pretty adorable chinos from H&M that come in an array of colors and are constructed with a chino fabric, but are casual enough that my boys will wear them ragged after the wedding (something I nearly always consider when purchasing for my little ones.) 
Now…Onto the D.I.Y. portion!  (Disclaimer:  I am no professional seamstress/garment maker. This is my method and I was pleased with the final product.  Professionals, please look away;)


You will need:

Scissors

Measuring tape

Pins

Needle & thread

Fabric or tacky glue/glue gun

Alligator or other clip to secure bow tie to collar

Approx. ¼ yard of preferred fabric (I was able to make two bow ties out of this)

 
       1.        Begin by cutting your fabric into roughly a 14”w X 6 ½ “ h piece

 
2.        With the long side horizontally in front of you, fold ends in overlapping eachother, stopping with the top piece of fabric about 1” in after pressed under .5 in.  (sort of like a letter is folded in the mail, both sides folded in and overlapped)

 
3.       Now you will fold the short sides in to meet as well, this time just meeting in the center, slightly overlapping to prevent them from pulling apart when you pinch the fabric to make the bow tie look.

4.       Now holding everything in place with your fingers, pinch the bow tie in the center (I made two pleats in mine) and secure with a pin.  You can either do a stitch on the sewing machine, or with a needle and thread.

5.       Now cut a smaller square of fabric to 2” x 3” that will be used for the middle binding.   

6.       Length wise fold the raw sides in to meet at the center

7.       Wrap the fabric around the center of your bow tie, raw sides hidden under. 

8.       Position however tightly you want and overlap in the back.  I folded the edge under to keep it hidden, but this step isn’t necessary as I don’t think it would be too obvious if omitted. 

9.       Secure with a hand stich. 

10.   Now, take the clip you have chosen and slide it under the binding behind the stitches you’ve just made, upper side of the clip against the under side of the bow tie. 

11.   Secure with a bit of glue.

12.   Sit back and relax.  Give yourself a pat on the back and admire your adorable little bow tie. 

Ok folks!  That is IT!  Not too hard and it allows you to select the PERFECT fabric to fit your occasion.  Not to mention, bragging rights. 
Keep an eye out for my follow up post, ‘Getting your child to wear a bow tie for an entire evening.’  Ok, I’m totally kidding on that one...but I will take pointers if anyone has them. 

Thanks for listening and I hope this helps snazzy up your next occasion!

Xoxo, Heather


4.15.2016

My Twin Girl Nursery- Tiffany

Before I even knew if we were having a girl or boy and before we discovered we were having twins, I had a vision for what I wanted the nursery to look like.  The one inspiration that kept coming to mind was my Native American heritage and how I could incorporate that into a dream nursery.  I never expected that I would love it so much that I would find myself randomly walking into it just to admire what it became.

The planning got real when we finally found out at just over 18 weeks that we were having identical twin girls.  No more was I divided between color schemes and choosing masculine or feminine design elements.  I laid awake for hours each night imagining what I wanted this room to look like, how the layout would work with two cribs and of course pinning and online shopping till no end. 

I kept with the original theme and decided the color scheme would be lavender, mint, gold with whites and creams.  While I wanted it to express my heritage, I also wanted to convey this inspiration in a girly way.  I started looking everywhere on the internet for the elements that I was envisioning.  From there, everything just started coming together.

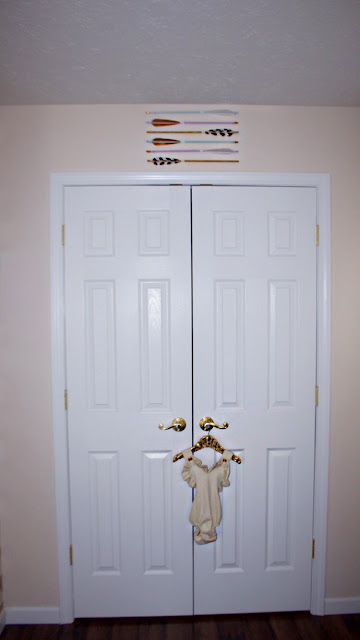
We started with tearing out the carpet to lay a laminate flooring.  Then chose a simple cream paint color without a yellow undertone.  We then changed the hardware on the closets to coordinate with the gold in the scheme and added some major closet organization. I think being organized with two babies was one of the things I stressed most about during this planning process.

For the cribs, I chose a simple modern style crib by Babyletto. For the crib bedding, I knew that I wanted my husband's grandmother to make them quilts that they can have as a keepsake.  I was having trouble finding fabrics at local stores and online that fit what I was picturing.  I decided to work with a designer on Spoonflower to make fabrics that went along with the overall vision.  

For the other furniture, we repurposed my old baby dresser and added decorative wood elements with new hardware and we also did a DIY side table that would fit into the space.  We purchased our rocker/glider from Pottery Barn after trying out multiple others and decided on this one because the size would allow me to feed both babies comfortably at once.  

The triangle painted wall was done entirely by my husband and took him over 60 total hours for him to complete by hand.  It goes without saying that we are all lucky to have him and his handiness;)

Other touches of artwork and handmade elements make up the rest of the room to complete the vision! 


Cribs // Babyletto
Wall Decals // Open Heart Creations
Nursery Prints // See Nikki Create
Fabric Garland // Penelope and Lala
Feather Mobile // The Dream Barn
Arrows // Mineral and Matter
Sheepskin Rug // Ikea
Similar Rug // West Elm
Ceiling Light Fixture // Land of Nod
Table Lamp // CB2
Hanging Cloud // Baby Jives Co.
Wooden Camera // Fawn Over Baby
Fawn Dolls // Live Sweet Shop
Gold Poof // Land of Nod
Rocker/Glider // Pottery Barn
Curtains // DIY to add ribbon.  White plain curtains from Ikea
Curtain Finials // Spray painted from Ikea
Book Shelfs // Painted from Ikea
Picture Frames // Ikea
Quilts, pillows, diaper basket cover // Handmade
Baby Beds // Made by my husband
Deer Antler // DIY by me
Baskets // Home Goods
Gallery Wall Items // Hobby Lobby


BLOG DESIGN BY BELLA LULU INK